Flutter PageView
官网地址:选择你的开发平台,开始使用 | Flutter 中文文档 - Flutter 中文开发者网站 - Flutter
文档地址:第二版序 | 《Flutter实战·第二版》 (flutterchina.club)
Flutter PageView
Flutter中的轮动图以及抖音上下滑页切换视频功能等等,这些都可以通过 PageView 轻松实现
PageView常见属性:
| 属性 | 描述 |
|---|---|
| scrollDirection | Axis.horizonta水平方向 Axis.vertical锤直方向 |
| children | 配置子元素 |
| allowImplicitScrolling | 缓存当前页面的前后两页 |
| onPageChanged | page改变的时候触发 |
1、PageView
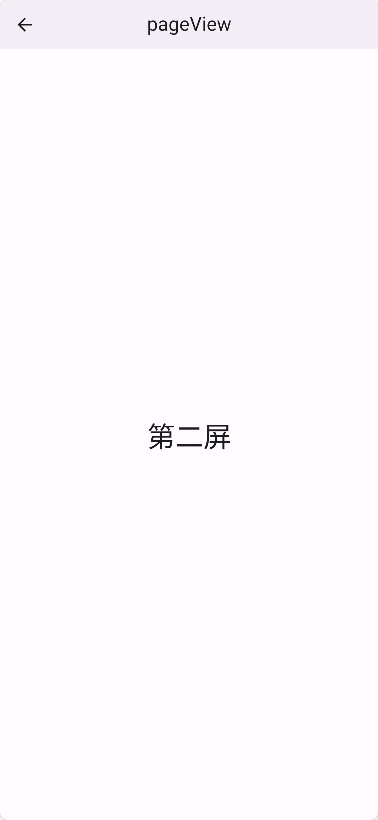
import 'package:flutter/material.dart';
class pageViewPage extends StatefulWidget {
const pageViewPage({super.key});
State<pageViewPage> createState() => _pageViewPageState();
}
class _pageViewPageState extends State<pageViewPage> {
Widget build(BuildContext context) {
return Scaffold(
appBar: AppBar(title: const Text('pageView')),
//PageView中children下的每一个组件都是一个页面,默认水平防线
body: PageView(
scrollDirection: Axis.vertical, //设置为垂直方向滑动
children: [
Center(
child: Text(
'第一屏',
style: Theme.of(context).textTheme.headlineLarge,
),
),
Center(
child: Text(
'第二屏',
style: Theme.of(context).textTheme.headlineLarge,
),
),
Center(
child: Text(
'第三屏',
style: Theme.of(context).textTheme.headlineLarge,
),
)
]),
);
}
}
2、pageViewBuilder
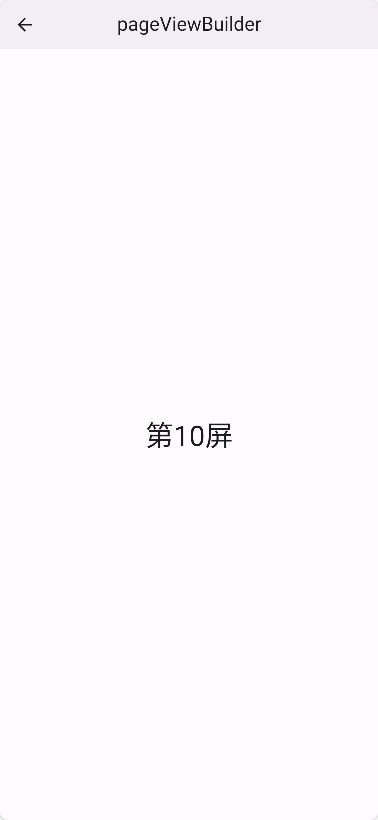
import 'package:flutter/material.dart';
class pageViewBuilder extends StatefulWidget {
const pageViewBuilder({super.key});
State<pageViewBuilder> createState() => _pageViewBuilderState();
}
class _pageViewBuilderState extends State<pageViewBuilder> {
Widget build(BuildContext context) {
return Scaffold(
appBar: AppBar(title: const Text('pageViewBuilder')),
body: PageView.builder(
scrollDirection: Axis.vertical, //设置方向
itemCount: 10, //总数10页
onPageChanged: (value) {
print(value);
},
itemBuilder: (context, index) {
return Center(
child: Text(
'第${index + 1}屏',
style: Theme.of(context).textTheme.headlineLarge,
),
);
}),
);
}
}
3、PageView上拉无限加载的实现思路
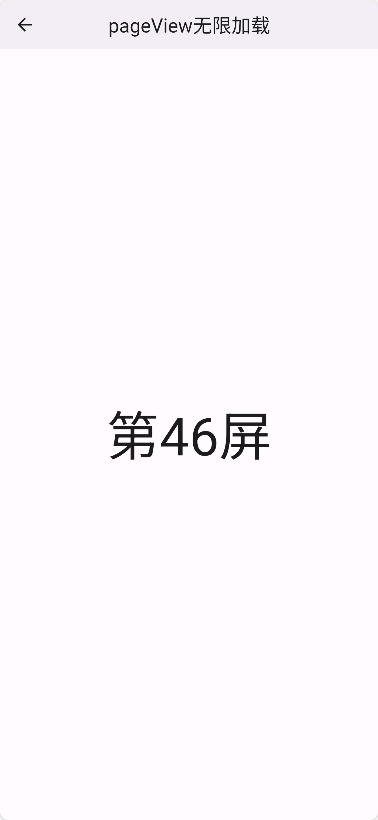
import 'package:flutter/material.dart';
class pageViewInfiniteLoad extends StatefulWidget {
const pageViewInfiniteLoad({super.key});
State<pageViewInfiniteLoad> createState() => _pageViewInfiniteLoadState();
}
class _pageViewInfiniteLoadState extends State<pageViewInfiniteLoad> {
// 初始化数据
List<Widget> list = [];
void initState() {
// TODO: implement initState
super.initState();
//循环添加10条
for (var i = 0; i < 10; i++) {
list.add(Center(
child: Text(
"第${i + 1}屏",
style: const TextStyle(fontSize: 60),
),
));
}
}
Widget build(BuildContext context) {
return Scaffold(
appBar: AppBar(title: const Text('pageView无限加载')),
body: PageView(
scrollDirection: Axis.vertical,
onPageChanged: (index) {
//监听index是索引,如果到最后一个了 立马再给list.add一个数据
if (index == list.length - 1) {
list.add(Center(
child: Text(
"第${list.length + 1}屏",
style: const TextStyle(fontSize: 60),
),
));
}
},
children: list,
),
);
}
}
4、PageView实现轮播图功能

import 'package:flutter/material.dart';
class pageViewSwiper extends StatefulWidget {
const pageViewSwiper({super.key});
State<pageViewSwiper> createState() => _pageViewSwiperState();
}
class _pageViewSwiperState extends State<pageViewSwiper> {
List<Widget> list = [];
int _currentInbdex = 0;
void initState() {
// TODO: implement initState
super.initState();
// 添加三个轮播
for (var i = 0; i < 3; i++) {
list.add(ImagePage(
src: 'https://picsum.photos/500/200?id=$i',
));
}
}
Widget build(BuildContext context) {
return Scaffold(
appBar: AppBar(title: const Text('pageView实现轮播图')),
body: Stack(
children: [
SizedBox(
height: 200,
child: PageView.builder(
onPageChanged: ((index) {
setState(() {
//当前索引_currentInbdex=index % list.length;
_currentInbdex = index % list.length;
});
}),
itemCount: 10000,
itemBuilder: ((context, index) {
//返回list的第index % list.length个元素
return list[index % list.length];
})),
),
// 轮播图的点
Positioned(
left: 0, //设置left 0 和right0 就会占满整行
right: 0,
bottom: 2,
child: Row(
mainAxisAlignment: MainAxisAlignment.center,
children: List.generate(list.length, (index) {
return Container(
margin: const EdgeInsets.all(5),
width: 10,
height: 10,
decoration: BoxDecoration(
color:
_currentInbdex == index ? Colors.blue : Colors.grey,
shape: BoxShape.circle, //圆
// borderRadius: BorderRadius.circular(5)
),
);
}).toList()))
],
),
);
}
}
// image图片组件
class ImagePage extends StatefulWidget {
final double width;
final double height;
final String src;
const ImagePage(
{super.key,
this.width = double.infinity,
this.height = 200,
required this.src});
State<ImagePage> createState() => _ImagePageState();
}
class _ImagePageState extends State<ImagePage> {
Widget build(BuildContext context) {
return SizedBox(
width: widget.width,
height: widget.height,
child: Image.network(
widget.src,
fit: BoxFit.cover,
),
);
}
}
5、轮播图代码抽离+定时器控制轮播自动切换
5.1、widget/swiper.dart
import 'dart:async';
import 'package:flutter/material.dart';
class Swiper extends StatefulWidget {
final double width;
final double height;
final List<String> list; //图片列表
const Swiper(
{super.key,
this.height = 200,
this.width = double.infinity,
required this.list});
State<Swiper> createState() => _SwiperState();
}
class _SwiperState extends State<Swiper> {
int _currentInbdex = 0;
List<Widget> pageList = [];
late PageController _pageController;
late Timer timer;
void initState() {
// TODO: implement initState
super.initState();
// 添加轮播图片数据
for (var i = 0; i < widget.list.length; i++) {
pageList.add(ImagePage(
src: widget.list[i],
width: widget.width,
height: widget.height,
));
}
// PageController当前激活的轮播
_pageController = PageController(initialPage: 0);
//每隔3秒
timer = Timer.periodic(Duration(seconds: 3), (t) {
_pageController.animateToPage((_currentInbdex + 1) % pageList.length,
duration: Duration(milliseconds: 200), curve: Curves.linear);
});
}
// 页面销毁时
void dispose() {
// TODO: implement dispose
super.dispose();
timer.cancel(); //销毁定时器
_pageController.dispose(); //销毁控制器
}
Widget build(BuildContext context) {
return Stack(
children: [
SizedBox(
height: 200,
child: PageView.builder(
controller: _pageController, //控制第几个
onPageChanged: ((index) {
setState(() {
//当前索引_currentInbdex=index % list.length;
_currentInbdex = index % widget.list.length;
});
}),
itemCount: 10000,
itemBuilder: ((context, index) {
//返回list的第index % list.length个元素
return ImagePage(
src: widget.list[index % widget.list.length],
);
})),
),
// 轮播图的点
Positioned(
left: 0, //设置left 0 和right0 就会占满整行
right: 0,
bottom: 2,
child: Row(
mainAxisAlignment: MainAxisAlignment.center,
children: List.generate(widget.list.length, (index) {
return Container(
margin: const EdgeInsets.all(5),
width: 10,
height: 10,
decoration: BoxDecoration(
color:
_currentInbdex == index ? Colors.blue : Colors.grey,
shape: BoxShape.circle, //圆
// borderRadius: BorderRadius.circular(5)
),
);
}).toList()))
],
);
}
}
// image图片组件
class ImagePage extends StatefulWidget {
final double width;
final double height;
final String src;
const ImagePage(
{super.key,
this.width = double.infinity,
this.height = 200,
required this.src});
State<ImagePage> createState() => _ImagePageState();
}
class _ImagePageState extends State<ImagePage> {
Widget build(BuildContext context) {
return SizedBox(
width: widget.width,
height: widget.height,
child: Image.network(
widget.src,
fit: BoxFit.cover,
),
);
}
}
5.2、pageViewSwiper.dart
import 'dart:async';
import 'package:flutter/material.dart';
import './widget/Swiper.dart'; //swiper组件
class pageViewSwiper extends StatefulWidget {
const pageViewSwiper({super.key});
State<pageViewSwiper> createState() => _pageViewSwiperState();
}
class _pageViewSwiperState extends State<pageViewSwiper> {
List<String> list = [];
void initState() {
// TODO: implement initState
super.initState();
list = const [
'https://picsum.photos/500/200?id=1',
'https://picsum.photos/500/200?id=2',
'https://picsum.photos/500/200?id=3'
];
}
Widget build(BuildContext context) {
return Scaffold(
appBar: AppBar(title: const Text('pageView实现轮播图')),
body: ListView(
children: [
Swiper(
list: list,
)
],
));
}
}
6、AutomaticKeepAliveClientMixin 缓存PageView页面
通过上面的例子我们会发现 每次滑动的时候都会触发子组件中的 build方法 print(widget.url);
可见 PageView 默认并没有缓存功能,一旦页面滑出屏幕它就会被销毁 ,实际项目开发中对页面进行缓
存是很常见的一个需求,下面我们就看看如何使用AutomaticKeepAliveClientMixin 缓存页面。
**注意:**使用时一定要注意是否必要,因为对所有列表项都缓存的会导致更多的内存消耗。
只需要两步:
6.1、添加with AutomaticKeepAliveClientMixin
class _MyContinerState extends State<MyContiner> with AutomaticKeepAliveClientMixin{
    ...
}
6.2、添加 bool get wantKeepAlive => true;(可按照提示生成)
// TODO: implement wantKeepAlive
bool get wantKeepAlive => true;
6.3、完整代码
import 'package:flutter/material.dart';
class pageViewKeepAlive extends StatefulWidget {
const pageViewKeepAlive({super.key});
State<pageViewKeepAlive> createState() => _pageViewKeepAliveState();
}
class _pageViewKeepAliveState extends State<pageViewKeepAlive> {
Widget build(BuildContext context) {
return Scaffold(
appBar: AppBar(title: const Text('PageViewKeepAlive')),
body: PageView.builder(
scrollDirection: Axis.vertical,
itemCount: 10,
itemBuilder: ((context, index) {
return MyContiner(
num: index,
);
}),
));
}
}
// 自定义组件
class MyContiner extends StatefulWidget {
final int num;
MyContiner({super.key, required this.num});
State<MyContiner> createState() => _MyContinerState();
}
class _MyContinerState extends State<MyContiner>
with AutomaticKeepAliveClientMixin {
Widget build(BuildContext context) {
print(widget.num); //默认数据煤油缓存,每次滑动都会执行build
//
return Center(
child: Text(
'第${widget.num + 1}屏',
style: Theme.of(context).textTheme.headlineSmall,
),
);
}
// TODO: implement wantKeepAlive
bool get wantKeepAlive => true; //返回true表示缓存页面
}
7、自定义KeepAliveWrapper 缓存页面
AutomaticKeepAliveClientMixin 可以快速的实现页面缓存功能,但是通过混入的方式实现不是很优
雅, 所以我们有必要对AutomaticKeepAliveClientMixin 混入进行封装
注意:如果页面比较多 缓存会耗费内存
7.1、添加tool/KeepAliveWrapper.dart
import 'package:flutter/material.dart';
// 缓存组件只需要引入传入要缓存的child
// 注意:如果页面比较多 缓存会耗费内存
class KeepAliveWrapper extends StatefulWidget {
const KeepAliveWrapper(
{Key? key, this.child, this.keepAlive = true})
: super(key: key);
final Widget? child;
final bool keepAlive;
State<KeepAliveWrapper> createState() => _KeepAliveWrapperState();
}
class _KeepAliveWrapperState extends State<KeepAliveWrapper>
with AutomaticKeepAliveClientMixin {
Widget build(BuildContext context) {
super.build(context);
return widget.child!;
}
bool get wantKeepAlive => widget.keepAlive;
void didUpdateWidget(covariant KeepAliveWrapper oldWidget) {
if (oldWidget.keepAlive != widget.keepAlive) {
// keepAlive 状态需要更新,实现在 AutomaticKeepAliveClientMixin 中
updateKeepAlive();
}
super.didUpdateWidget(oldWidget);
}
}
7.2、使用缓存组件
import 'package:flutter/material.dart';
import 'package:bangda/toos/KeepAliveWrapper.dart'; //引入封装好的设置缓存组件
// 缓存组件的混入实例
class pageViewKeepAlive extends StatefulWidget {
const pageViewKeepAlive({super.key});
State<pageViewKeepAlive> createState() => _pageViewKeepAliveState();
}
class _pageViewKeepAliveState extends State<pageViewKeepAlive> {
Widget build(BuildContext context) {
return Scaffold(
appBar: AppBar(title: const Text('PageViewKeepAlive')),
body: PageView.builder(
scrollDirection: Axis.vertical,
itemCount: 10,
itemBuilder: ((context, index) {
return KeepAliveWrapper(
child: MyContiner(
num: index,
));
}),
));
}
}
// 自定义组件
class MyContiner extends StatefulWidget {
final int num;
MyContiner({super.key, required this.num});
State<MyContiner> createState() => _MyContinerState();
}
class _MyContinerState extends State<MyContiner>
with AutomaticKeepAliveClientMixin {
Widget build(BuildContext context) {
super.build(context);
print(widget.num); //默认数据煤油缓存,每次滑动都会执行build
//
return Center(
child: Text(
'第${widget.num + 1}屏',
style: Theme.of(context).textTheme.headlineSmall,
),
);
}
// TODO: implement wantKeepAlive
bool get wantKeepAlive => true; //返回true表示缓存页面
}
8、flutter的key
我们平时一定接触过很多的 Widget,比如 Container、Row、Column 等,它们在我们绘制界面的过程
中发挥着重要的作用。但是不知道你有没有注意到,在几乎每个 Widget 的构造函数中,都有一个共同
的参数,它们通常在参数列表的第一个,那就是 Key。
在Flutter中,Key****是不能重复使用的,所以Key一般用来做唯一标识。组件在更新的时候,其状态的保
存主要是通过判断组件的类型或者key****值是否一致。因此,当各组件的类型不同的时候,类型已经足够
用来区分不同的组件了,此时我们可以不必使用key。但是如果同时存在多个同一类型的控件的时候,
此时类型已经无法作为区分的条件了,我们就需要使用到key。
8.1、没有 Key会发生什么奇怪现象?
如下面例: 定义了一个StatefulWidget的Box,点击Box的时候可以改变Box里面的数字,当我们重新
对Box排序的时候Flutter就无法识别到Box的变化了, 这是什么原因呢?
案例代码
import 'package:flutter/material.dart';
class FlutterKeyBoxPage extends StatefulWidget {
const FlutterKeyBoxPage({super.key});
State<FlutterKeyBoxPage> createState() => _FlutterKeyBoxPageState();
}
class _FlutterKeyBoxPageState extends State<FlutterKeyBoxPage> {
List<Widget> list = [
const Box(
color: Colors.red,
),
const Box(
color: Colors.green,
),
const Box(
color: Colors.blue,
),
];
Widget build(BuildContext context) {
return Scaffold(
appBar: AppBar(
title: const Text('FlutterKeyBoxPage'),
),
body: Center(
child: Column(
mainAxisAlignment: MainAxisAlignment.center,
children: list,
),
),
floatingActionButton: FloatingActionButton(
onPressed: () {
setState(() {
list.shuffle(); //随机排列
});
},
child: const Icon(Icons.refresh)),
);
}
}
// box组件
class Box extends StatefulWidget {
final Color color;
// 传递每个组件key
const Box({super.key, required this.color});
State<Box> createState() => _BoxState();
}
class _BoxState extends State<Box> {
int _count = 0;
Widget build(BuildContext context) {
return SizedBox(
width: 100,
height: 100,
child: ElevatedButton(
style: ButtonStyle(
backgroundColor: MaterialStateProperty.all(widget.color)),
onPressed: () {
setState(() {
_count++;
});
},
child: Text(
'$_count',
style: Theme.of(context).textTheme.headlineLarge,
)),
);
}
}
运行后我们发现改变list Widget顺序后,Widget颜色会变化,但是每个Widget里面的文本内容并没有变化,为什么会这样呢?当我们List重新排序后Flutter检测到了Widget的顺序变化,所以重新绘制ListWidget,但是Flutter 发现List Widget 里面的元素没有变化,所以就没有改变Widget里面的内容。
把List 里面的Box的颜色改成一样,这个时候您重新对list进行排序,就很容易理解了。重新排序后虽然执行了setState,但是代码和以前是一样的,所以Flutter不会重构List Widget里面的内容, 也就是Flutter没法通过Box里面传入的参数来识别Box是否改变。如果要让FLutter能识别到List Widget子元素的改变,就需要给每个Box指定一个key。
List<Widget> list = [
    Box(
    color: Colors.blue,
    ),
    Box(
    color: Colors.blue,
    ),
    Box(
    color: Colors.blue,
    )
];
8.2、LocalKey、GlobalKey
在Flutter中,Key****是不能重复使用的,所以Key一般用来做唯一标识。组件在更新的时候,其状态的保存主要是通过判断组件的类型或者key****值是否一致。因此,当各组件的类型不同的时候,类型已经足够用来区分不同的组件了,此时我们可以不必使用key。但是如果同时存在多个同一类型的控件的时候,此时类型已经无法作为区分的条件了,我们就需要使用到key。
Flutter key子类包含 LocalKey 和 GlobalKey 。
8.2.1、局部键(LocalKey):ValueKey、ObjectKey、UniqueKey
- ValueKey (值key)把一个值作为key
- UniqueKey(唯一key)程序生成唯一的Key
- ObjectKey(对象key)把一个对象实例作为key
改造上方代码
List<Widget> list = [
const Box(
color: Colors.red,
key: ValueKey('red'), //指定唯一值 用得最多
),
Box(
color: Colors.green,
key: UniqueKey(), //唯一值 运行时随机生成 如果不知道传什么就用UniqueKey
),
const Box(
color: Colors.blue,
key: ObjectKey(Box(color: Colors.blue)), //对象key传一个对象
),
];
//box组件传递key 具体结合上方代码更改
// box组件
class Box extends StatefulWidget {
final Color color;
// 传递每个组件key
const Box({Key? key, required this.color}) : super(key: key);
State<Box> createState() => _BoxState();
}
8.2.2、全局键(GlobalKey): GlobalKey、GlobalObjectKey
案例:监听屏幕旋转事件
//获取屏幕的选择方向
    print(MediaQuery.of(context).orientation);
获取到横屏打印:Orientation.portrait
获取到竖屏打印:Orientation.landscape
其余代码参照8、flutter的key
//...其余代码
Widget build(BuildContext context) {
//获取屏幕的选择方向
print(MediaQuery.of(context).orientation);
return Scaffold(
appBar: AppBar(
title: const Text('FlutterKeyBoxPage'),
),
body: Center(
// 横屏使用Column组件,竖屏使用Row组件
child: MediaQuery.of(context).orientation == Orientation.portrait
? Column(
mainAxisAlignment: MainAxisAlignment.center,
children: list,
)
: Row(
mainAxisAlignment: MainAxisAlignment.center,
children: list,
),
),
floatingActionButton: FloatingActionButton(
onPressed: () {
setState(() {
list.shuffle(); //随机排列
});
},
child: const Icon(Icons.refresh)),
);
}
//...其余代码
分析问题:
点击每个盒子,添加给_count添加状态,然后旋转后从column变成row 后类型变了 因为没有指定key 所以重置了,所以需要使用全局key
使用全局key改造后
import 'package:flutter/material.dart';
class FlutterKeyBoxPage extends StatefulWidget {
const FlutterKeyBoxPage({super.key});
State<FlutterKeyBoxPage> createState() => _FlutterKeyBoxPageState();
}
class _FlutterKeyBoxPageState extends State<FlutterKeyBoxPage> {
List<Widget> list = [];
// 定义全局key
final GlobalKey _globalKey1 = GlobalKey();
final GlobalKey _globalKey2 = GlobalKey();
final GlobalKey _globalKey3 = GlobalKey();
void initState() {
super.initState();
list = [
Box(
color: Colors.red,
key: _globalKey1,
),
Box(
color: Colors.green,
key: _globalKey2,
),
Box(
color: Colors.blue,
key: _globalKey3,
),
];
}
Widget build(BuildContext context) {
//获取屏幕的选择方向
print(MediaQuery.of(context).orientation);
return Scaffold(
appBar: AppBar(
title: const Text('FlutterKeyBoxPage'),
),
body: Center(
// 横屏使用Column组件,竖屏使用Row组件
child: MediaQuery.of(context).orientation == Orientation.portrait
? Column(
mainAxisAlignment: MainAxisAlignment.center,
children: list,
)
: Row(
mainAxisAlignment: MainAxisAlignment.center,
children: list,
),
),
floatingActionButton: FloatingActionButton(
onPressed: () {
setState(() {
list.shuffle(); //随机排列
});
},
child: const Icon(Icons.refresh)),
);
}
}
// box组件
class Box extends StatefulWidget {
final Color color;
// 传递每个组件key
const Box({Key? key, required this.color}) : super(key: key);
State<Box> createState() => _BoxState();
}
class _BoxState extends State<Box> {
int _count = 0;
Widget build(BuildContext context) {
return SizedBox(
width: 100,
height: 100,
child: ElevatedButton(
style: ButtonStyle(
backgroundColor: MaterialStateProperty.all(widget.color)),
onPressed: () {
setState(() {
_count++;
});
},
child: Text(
'$_count',
style: Theme.of(context).textTheme.headlineLarge,
)),
);
}
}
因为在box中指定了全局key,所以在box中的column变成row的时候,因为box的key没有改变,所以不会重置数据
8.3、GlobalKey 获取子组件
globalKey.currentState 可以获取子组件的状态,执行子组件的方法,globalKey.currentWidget可以获取子组件的属性,_globalKey.currentContext!.findRenderObject()可以获取渲染的属性。
既然这样 那么父亲传子 和子传父都很容易实现...
import 'package:flutter/material.dart';
// 父组件获取子组件 (父组件)
class FlutterGlobalKeyGetChildPage extends StatefulWidget {
const FlutterGlobalKeyGetChildPage({super.key});
State<FlutterGlobalKeyGetChildPage> createState() =>
_FlutterGlobalKeyGetChildPageState();
}
class _FlutterGlobalKeyGetChildPageState
extends State<FlutterGlobalKeyGetChildPage> {
// 定义全局key
final GlobalKey _globalKey1 = GlobalKey();
Widget build(BuildContext context) {
return Scaffold(
// 父组件按钮改变子组件的值
floatingActionButton: FloatingActionButton(
child: const Icon(Icons.add),
onPressed: () {
// 通过子组件的_globalKey1来获取的属性,注意要添加as 类型推导
var boxState = _globalKey1.currentState as _BoxState;
// 这样就可以在父组件来改变子组件的值
setState(() {
boxState._count++;
});
// 同样也能调用方法
boxState.run();
},
),
appBar: AppBar(
title: const Text('GlobalKey获取子组件'),
),
body: Center(
child: Center(
child: Box(
color: Colors.red,
key: _globalKey1,
)),
),
);
}
}
// box组件(子组件)
class Box extends StatefulWidget {
final Color color;
// 传递每个组件key
const Box({Key? key, required this.color}) : super(key: key);
State<Box> createState() => _BoxState();
}
class _BoxState extends State<Box> {
int _count = 0;
void run() {
print('run方法执行:当前_count:$_count');
}
Widget build(BuildContext context) {
return SizedBox(
width: 100,
height: 100,
child: ElevatedButton(
style: ButtonStyle(
backgroundColor: MaterialStateProperty.all(widget.color)),
onPressed: () {
setState(() {
_count++;
});
},
child: Text(
'$_count',
style: Theme.of(context).textTheme.headlineLarge,
)),
);
}
}
8.4、Widget Tree、Element Tree 和 RenderObject Tree
Flutter应用是由是Widget Tree、Element Tree 和 RenderObject Tree组成
Widget可以理解成一个类,Element可以理解成Widget的实例,Widget与Element的关系可以是一对
多,一份配置可以创造多个Element实例
| 属性 | 描述 |
|---|---|
| Widget | Widget就是一个类, 是Element 的配置信息。与Element的关系可以是一对 |
| Element | Widget 的实例化,内部持有Widget和RenderObject。 |
| RenderObject | 负责渲染绘制 |
默认情况下面,当Flutter同一个 Widget的大小,顺序变化的时候,FLutter不会改变Widget的state。
在案例([8.3、GlobalKey 获取子组件](#8.3、GlobalKey 获取子组件))的onPressed中加上以上代码
// 父组件按钮改变子组件的值
      floatingActionButton: FloatingActionButton(
        child: const Icon(Icons.add),
        onPressed: () {
          //1. 获取currentState Widget的属性
          // 通过子组件的_globalKey1来获取的属性,注意要添加as 类型推导
          var boxState = _globalKey1.currentState as _BoxState;
          // 这样就可以在父组件来改变子组件的值
          setState(() {
            boxState._count++;
          });
          // 同样也能调用方法
          boxState.run();

          // 2.获取子Widget(获取子组件的数据)
          var boxWidget = _globalKey1.currentWidget as Box;
          // 获取到它的color
          print(boxWidget.color);

          // 3.获取子组件渲染的属性
          var renderBox =
              _globalKey1.currentContext!.findRenderObject() as RenderBox;
          // 获取到它的count
          print(renderBox.size); //Size(100.0, 100.0)
        },
      ),
